
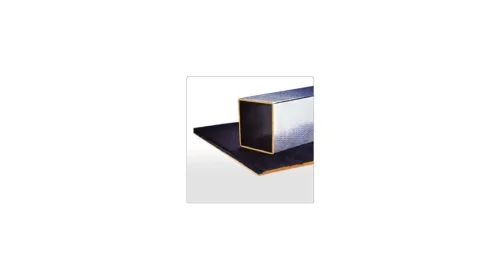
Proper installation of insulation duct boards is essential for ensuring efficient HVAC performance, energy savings, and long-term durability. Insulation duct boards are widely used in commercial and residential HVAC systems because they provide thermal insulation, sound absorption, and moisture control while maintaining structural integrity in ductwork. Following the correct installation procedures helps maximize the benefits of these boards and ensures that the HVAC system operates effectively.
High-quality Insulation Duct Board products are designed for ease of handling and installation. However, even the best materials can underperform if installed incorrectly. This guide provides a comprehensive overview of the steps, tools, and best practices required to achieve a reliable and efficient duct insulation setup.
Table of Contents
TogglePreparation and Planning
Before beginning installation, thorough planning and preparation are critical. Start by reviewing the HVAC system design and determining the duct dimensions, layout, and required insulation thickness. Make sure to measure and mark all areas where the insulation boards will be installed.
Proper planning also involves ensuring that all necessary tools and materials are on hand, including a utility knife, straightedge, adhesive, mechanical fasteners, tape, and protective gear. Pre-cutting the insulation boards to approximate sizes based on duct measurements can save time during installation and reduce material waste. Adequate preparation ensures a smooth installation process and reduces the likelihood of errors.
Cutting and Shaping Insulation Boards
Insulation duct boards must be cut accurately to fit the dimensions of the ductwork. Use a sharp utility knife or insulation saw to make precise cuts. A straightedge or metal ruler can help achieve clean, straight edges. It is important to cut slightly smaller than the actual duct dimensions to allow for proper fitting and easy adjustments during installation.
Corners, joints, and irregular sections of the duct may require custom shaping. Carefully trim the insulation board to fit these areas snugly, ensuring that the board makes full contact with the duct surface without leaving gaps. Proper cutting and shaping are essential for achieving optimal thermal and acoustic performance.
Attaching Insulation Boards to Ducts
There are several methods for attaching insulation duct boards, depending on the type of duct material and installation requirements. Mechanical fasteners such as screws or pins can secure the boards to metal or wooden ducts. For adhesive applications, apply a uniform layer of approved insulation adhesive to the duct surface and press the board firmly into place.
Ensure that boards are tightly but carefully fitted to prevent gaps or spaces where air leakage could occur. Overlapping or misaligned boards can compromise insulation effectiveness and reduce energy efficiency. For added durability, some installations use both adhesive and mechanical fasteners to ensure that boards remain securely attached over time.
Sealing Joints and Edges
Sealing all joints, edges, and seams is a critical step in insulation duct board installation. Use specialized HVAC tape or sealant to cover seams and prevent air leakage. Proper sealing also enhances thermal performance and prevents moisture intrusion, which can lead to mold growth or insulation degradation.
For internal duct seams, ensure that the sealing material is compatible with the insulation board and will maintain adhesion over time. Pay special attention to corners and intersections where boards meet, as these areas are prone to gaps or thermal bridging.
Ensuring Proper Clearance and Ventilation
During installation, maintain adequate clearance between insulation boards and other components such as electrical wiring, mechanical fasteners, or duct supports. This ensures safety, reduces the risk of damage, and allows for proper airflow around the duct system. Avoid compressing the boards excessively, as this can reduce insulation performance.
Additionally, consider ventilation requirements and airflow patterns within the HVAC system. Boards should not obstruct airflow or reduce duct cross-sectional area, as this could negatively impact system efficiency and create hotspots or pressure drops.
Inspection and Quality Checks
After installation, perform a thorough inspection to ensure that all boards are securely attached, seams are sealed, and surfaces are uniform. Check for gaps, misaligned panels, or signs of damage. Correct any issues immediately to maintain the integrity of the insulation system.
Periodic inspections after initial installation can also help identify areas where boards may have shifted or degraded over time. Routine maintenance ensures that the HVAC system continues to operate efficiently and that energy and acoustic performance remain consistent.
Safety Considerations
Handling insulation duct boards requires basic safety precautions. Wear gloves, protective clothing, and a dust mask to prevent irritation from fiberglass or other insulation fibers. Ensure that cutting tools are used safely and that work areas are free of hazards. Proper safety measures protect workers and prevent accidents during installation.
Conclusion
Installing insulation duct boards correctly is essential for maximizing the efficiency, durability, and performance of HVAC systems. By following careful planning, precise cutting, secure attachment, proper sealing, and thorough inspection procedures, installers can ensure that duct insulation provides consistent thermal and acoustic benefits.
Well-installed insulation duct boards not only improve energy efficiency and reduce operational costs but also enhance indoor comfort and air quality. Following these installation guidelines helps achieve reliable, long-lasting results in both commercial and residential HVAC applications.


